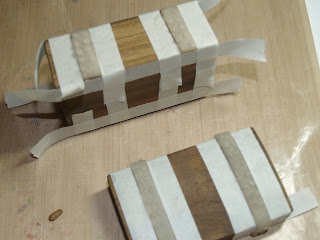
Taped and ready for gold leaf
Gold leafed bands complete.
Here is the treasure chest with gold leafed bands and 2 coats of sealant. Now for the final phase of detailing, antiquing and distressing
Black paint is added to give a distressed, aged look. I applied a heavy coat of paint then used a Q-tip to remove the excess and get the look I wanted.
I have burnished the bands with black paint, let it mostly dry then wiped off the excess to give an aged appearance. I added a few lines on the wood to age the chest itself then the hardware got the same treatment and was re-attached to the chest.
Here is a side by side comparison of the chests, before and after. Not to shabby for a chest that cost less than a dollar at Michaels!
These are some of the goodies that will make up the treasure for this cute little chest.
Check back soon to see the completed chest filled with goodies. The bottle will have a treasure map inside and I have some tiny pearls and gold chains to drape through it. Then on to build the rest of the base for this.
Thanks for looking :)
Debbie


No comments:
Post a Comment