I’ve been working on a mermaid for a contest being hosted by
Jack Johnston and I’m very pleased with how she is coming out. As I was
getting ready to add her tail fin I did a lot of research. I looked at videos,
I did a google search, I looked at YouTube and most of what I found recommended
to add the fin then bake the clay used to attach it to the body with a heat
gun. Yikes! That sounded a little scary to me.
Heat guns get hot, much hotter than the temperature necessary to cure
clay so I thought I would do an experiment with baking the Angelina Film, on
the doll, in the oven.

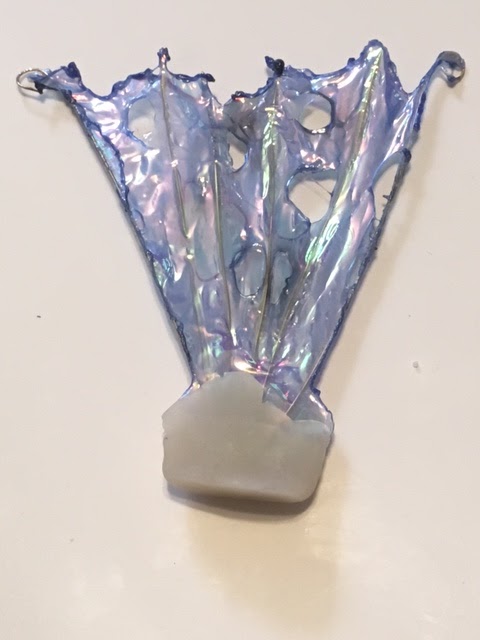
This is the faux tail I made for my 1st experiment.
I used “The Ultimate” glue to attach the wires to the bottom layer of film. When
adding the glue to the wires I used a needle and applied a thin layer to both
the top and the bottom of the wire. I then added another layer of film on top of
the wires and trimmed the excess film from around the wires. Once I had the
basic shape I covered the base in translucent clay, making sure the bases of
all the wires were enclosed in clay.
I baked the tail in a pre-heated oven at ̊275.
At first I thought it would be a total fail because the film immediately shrunk
a bit, but then it stabilized. My original goal was to see if I could bake it
for 15 minutes. That came and went so I continued for a total of 30 minutes which
was my ultimate goal. Why 30 minutes? Because the clay that I prefer bakes for
30 minutes per ¼ inch to cure properly. I knew I could attach a tail with ¼ inch
or less thickness of clay so this was the perfect amount of time.
Here is what it looked like when I removed it from the oven
after 30 minutes. Notice that the film is not super shiny and there is a gap at
the top where the two separated.
Here it is once I heat the film with a heat tool and shaped
it with a candle flame. Using the heat gun adhered the two layers of film
together and made it shiny and translucent.
I consider this a success.
For my second try I went with a larger tail, one closer to
what I will need for my mermaid.
I used the same steps, gluing the wires onto the film and
adding a second layer of film on top of the wires. Shaping it and baking it for
15 minutes. This time the clay that I used on then end was only 1/8 in thick so
I did not need the full 30 minutes.
Here it is direct from the over
Here it is once I heated it with a heat tool and shaped it
with the candle flame.
Here are both experiments. I’m very pleased. Yes, I know the tails look a bit ratty and have soot on them, I wasn't going for perfect, just making sure the film reacted the way I wanted it to.
***Before baking your Angelina film test bake a sample to see how the color shifts***
My next step will be to design the tail for my current mermaid.
Scary stuff. I am so happy with how she is turning out that I do not want to
ruin her with a bad tail, but she needs a tail!
Here she is trying on one of the practice tails.
She just came out of the oven and now has arms. Next up I'll be adding her hands, a tail and her hair. Stay tuned for more pictures